Getting stuck with a dead car battery is a situation no driver enjoys. Fortunately, jump-starting a car is a relatively simple process if done correctly, and it can save you from a tow or long wait for roadside assistance. In this blog, I’ll guide you through the process of jump-starting a car safely and efficiently.
What You Need to Jump-Start a Car
Before you begin, make sure you have the necessary tools:
- Jumper cables: These are thick insulated wires with clamps on both ends, usually color-coded red for positive and black for negative.
- A second vehicle with a working battery: This will serve as the power source.
- Gloves and safety goggles (optional but recommended): For extra protection from sparks or battery acid.
Precautions Before Jump-Starting
Jump-starting involves transferring electricity from one car battery to another, so it’s important to take a few safety precautions:
- Check for damage: If either battery appears damaged (leaking fluid, cracked, or bulging), do not attempt a jump-start. Replace the battery instead.
- Ensure compatibility: Both vehicles should be of similar voltage, typically 12 volts. Jump-starting from a higher voltage vehicle can cause damage.
- Turn off electronics: Ensure that radios, headlights, and other electronics in both cars are off to avoid potential surges.
- Keep the batteries dry: Water and electricity do not mix, so ensure everything is dry before proceeding.
Step-by-Step Guide to Jump-Starting a Car
Follow these steps carefully to avoid any issues and ensure your safety.
1. Position the Cars Correctly
- Park the cars close together, but ensure they are not touching. This helps prevent accidental grounding or short circuits.
- Both vehicles should be in park (automatic) or neutral (manual) and with the parking brake engaged.
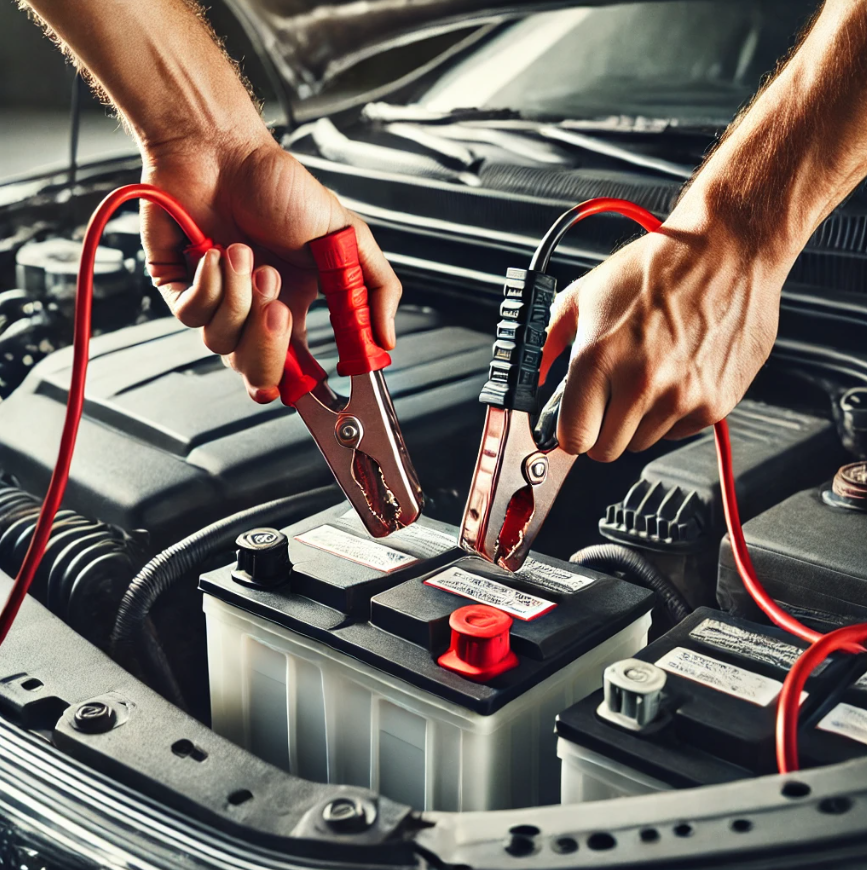
2. Connect the Jumper Cables
To avoid sparks or damage, connect the jumper cables in the correct order:
- Red (positive) clamp to the dead battery's positive terminal: Locate the positive terminal, usually marked with a "+" or "POS." Attach the red clamp securely to this terminal.
- Red (positive) clamp to the live battery's positive terminal: Attach the other end of the red jumper cable to the positive terminal of the working battery.
- Black (negative) clamp to the live battery's negative terminal: Now, attach the black clamp to the negative terminal ("-" or "NEG") on the working car's battery.
- Black (negative) clamp to a metal surface on the dead car: Instead of connecting the black clamp directly to the dead battery, attach it to an unpainted metal surface on the engine block or car frame. This helps reduce the risk of sparks near the battery.
3. Start the Working Vehicle
- Once the cables are securely connected, start the engine of the car with the good battery and let it idle for a few minutes. This allows the dead battery to gain some charge.
4. Start the Dead Vehicle
- After a few minutes, try starting the car with the dead battery. If it doesn’t start, wait a little longer for the battery to charge before trying again.
- Do not crank the engine for more than 5 seconds at a time. If it doesn’t start after a few attempts, there might be a bigger issue.
5. Let the Engine Run
- Once the car with the dead battery starts, let both cars idle for several minutes while still connected. This helps the dead battery charge a bit more.
6. Disconnect the Jumper Cables (in Reverse Order)
To safely disconnect the cables, do so in the reverse order of how you connected them:
- Remove the black clamp from the metal surface of the car with the dead battery.
- Remove the black clamp from the negative terminal of the working car.
- Remove the red clamp from the positive terminal of the working car.
- Remove the red clamp from the positive terminal of the dead car.
Be careful not to let the clamps touch each other while removing them.
7. Let the Recently Jump-Started Car Run
- After disconnecting the cables, let the car that was jump-started run for at least 15–20 minutes to ensure the battery has enough charge to function properly. You might also want to take a short drive to give the alternator time to recharge the battery.
Troubleshooting: What If the Car Doesn’t Start?
If the dead car still won’t start after several attempts, consider these possibilities:
- The battery is too far gone: If the battery is completely dead, it may not respond to a jump-start, and you may need to replace it.
- Check the cables: Ensure all the connections are tight and in the correct order.
- Alternator issues: The problem could be with the alternator, which is responsible for charging the battery. In this case, jump-starting won’t help, and the car will need professional attention.
- Starter motor problems: A faulty starter could also prevent the car from turning over, even with a charged battery.
Tips for Prolonging Battery Life
Once you’ve successfully jump-started the car, follow these tips to prevent future battery issues:
- Drive the car regularly: Regular use keeps the battery charged.
- Turn off all electronics: When parking, make sure all lights, radio, and electronics are off.
- Regularly check battery terminals: Ensure there’s no corrosion and clean them if necessary.
- Get the battery checked: Have your battery tested at regular intervals, especially if it’s more than three years old.
Safety Notes and Final Thoughts
Jump-starting a car is a straightforward process, but it does carry some risks. Make sure to follow the steps carefully and take your time with each connection. If you’re unsure about performing a jump-start yourself, don’t hesitate to call for roadside assistance or consult a mechanic.
Learning how to jump-start a car is a valuable skill for every driver. With a little knowledge and the right tools, you’ll be back on the road in no time!